Sunday, August 26, 2012

Weekly Snapshot: Knightly Blood Angel Conversion


I've been looking at the Horus Heresy: Collected Vision for some inspiration, and I've found some really interesting looking Space Marine helmet designs.

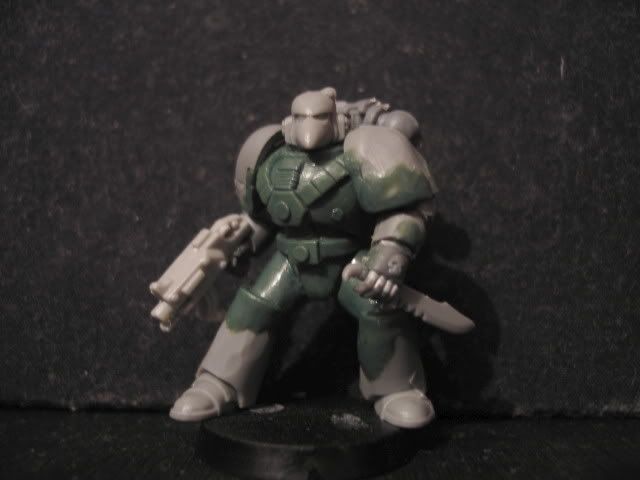
Pictured above is an AOBR marine converted to be taller than the average marine and have a more dynamic pose. The reposing tutorial can be found here.

From a normal marine helmet, I raised the top of his head a little bit, gave him a 'beak' and added a cross design. It kinda looks like a medieval knight helmet.

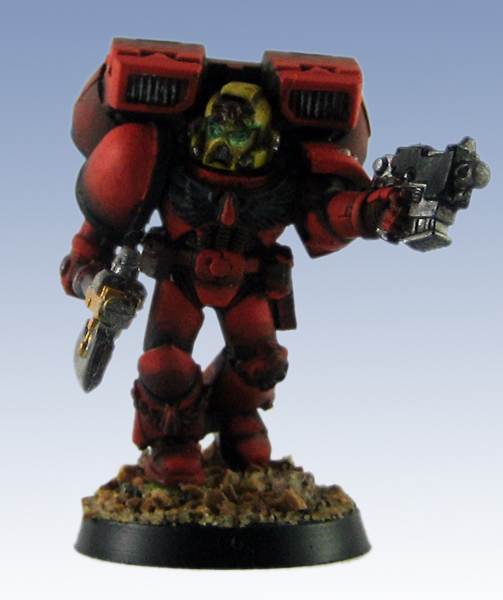
I got my inspiration from this picture, of Chapter Master Astelan in the Collected Visions book:

Another pre-heresy space marine tutorial coming soon!

Wednesday, August 22, 2012

Explorations of Miniature Photography


I have a serious issue with my photography skills. No matter how hard I try, the picture ends up looking too dark or the colours don't come out right. I don't think I need to provide a picture as proof, because I believe my older blog posts will do...

Here is what I do so far:

  • Switch to Macro mode
    -ensures objects that are extremely close to the camera lens, are in focus
  • Sit the camera on the table top (or tripod)
    -so that there aren't any wobbles or disruptions in the photograph
  • Use a lightbox
    -so that light will be evenly dispersed across the whole model, and prevent shadows 
  • Use three white lamps
    -maximum lighting!
  • Use a white backdrop 
    -so that light will bounce off and onto the model
  • Shoot in a dark room
    -prevents external light from interfering and distorting the photograph


These are the fundamentals of taking good photographs of minis, but just what is wrong with me?
Exposure. This is how much light your camera lets in. So the higher your exposure, the more light your photograph will be.


Zero exposure


1.5 Exposure
Definitely a huge improvement! The problem is, it looks a little unnatural and the reds are too harsh. 


A little editing on Photoshop and voila! I think I may have found the solution to my problem!
I'll try to figure out other ways of improving my photography.

Hope it helped for others as well!

Sunday, August 19, 2012

Weekly Snapshot: "We're Big Boys Now!"


"We're big boys now!" says my Blood Angels. Well, at least one of them.

This week, I made one of my boys true scale... in a manner of speaking. I simply chopped off his legs, pinned them so that they were longer, and filled the gap with green stuff.

Real simple stuff, but it has made my Space Marine so much more intimidating and realistic.
I've always had an issue with the proportions of the GW Space Marine. It was so...squat and even cuddly looking!

My reasoning behind this conversion was that I wanted to get the look of a genuine true scale conversion, but without all the hard work.


Doghouse Pattern Truescale Marine
Pictured above is Doghouse's amazing true scale marine. There's a link to his tutorial on Bolter and Chainsword if you're interested: here

But the thing is, it requires a feth load of time, effort, skill and loads of terminators legs.

A regular male's lower body is about the length of 4 heads stacked on top of another, excluding the groin. But GW's Space Marines aren't exactly in proportion. The upper part of the legs are shorter than the lower parts.

So I simply extended the upper parts so that they were equal in length to the lower parts. See my reasoning?


Wednesday, August 15, 2012

Cutting Costs: The Sculpting Tool(s)


This is Part 3 of Cutting Costs.

We all know that enjoying our little hobby can be tough on our wallets. And your ears as your wife/husband/girlfriend/boyfriend/dog repeatedly complains about those "little men". 

I've been trying my hand at sculpting lately, as you can see by the posts lately. Getting the right results can be tough. It's also frustrating when your giant fingerprint suddenly appears on the beautiful work you accomplished.

There's no real secret to sculpting. You need sculpting tools to do it. Imagine if you had to paint a tiny 28mm figure with your finger. Good luck with that!

But like all tools, dedicated sculpting tools are a liability; one that eats into your budget allocated for miniatures. 


Alright, I admit it. I'm guilty of using dedicated sculpting tools, one which I bought of course. But there's nothing wrong with using cheaper alternatives, you can achieve the same results most of the time.
I recommend this:


Good for your teeth, and good for your details! Use these for sculpting the details. Or, if you want a slightly larger size, you could always use the end of your brush. 

Sculpting putty has a habit of sticking to our fingers and our tools. A lot of people like to use oil or lubricant, but I use:


Water! Wet your hands and tools periodically with this. 


Next up:


These are good for achieving smooth areas. It's flat, cheap and also gives you an excuse to enjoy something delicious!


Sunday, August 12, 2012

Weekly Snapshot: Stuck...On a floating Island!


So today, I don't have a 40K or even wargaming related Weekly Snapshot. Why? Because I've been playing this all week!

Minecraft. Aaah... The only thing that is more addictive than the plastic and resin crack Games Workshop and Forgeworld  produces.

It is ridiculously addictive.


Now I realise many of you would probably have already heard of this map, or even played it. But I just wanted to share how awesome it is anyway. 

So this past week, I've been trying out a custom built map called Skyblock. Basically, you start off on 
an island...that is floating in the sky. 

You can barely walk anywhere without falling off. You're given a couple of resources that will help you survive and expand your little island. Above is where you start off. Scary, huh.

In the screenshot above that, you can see I've expanded my island significantly. The thing is, you have to balance between expanding and maintaining. If you expand too much, monsters will spawn on your island and can absolutely wreak havoc especially because of the small area.


Thursday, August 9, 2012

Tutorial - Easy MK4 Space Marine Helmets


In last week's Weekly Snapshot, I went from a default MKVII Space Marine helmet, to an MKIV.

So how would one achieve such a thing?
First of all, make sure you have these:
  • An MKVII SM helmet
  • Some form of sculpting tools
  • Sculpting putty (I used Green Stuff)
  • Your hands

Sunday, August 5, 2012

Weekly Snapshot: Assault Marines!


So today, I spent a couple of hours working on my Blood Angels again. Man, I hadn't touched red paint in ages!

You'd think that the main parts of the mini; for example the red of the assault marines, would be the most difficult and time consuming to paint.

Nope.

Yes, the red does take the longest to paint, but the details; helmet lenses, chainsword teeth, parchment, etc., are the most annoying. You have to keep switching the colour of the paint. They're so small, but they consume a surprisingly large amount of your painting time.

It's ridiculous.


I've spent all this time on them, yet I'm not happy with them. At least, not with the photographs.
I really don't know why they turn out darker than they should, I use a lightbox.

Perhaps I'll explore this issue in a post in the future.

Wednesday, August 1, 2012

Mastering shadows and highlights


So a while ago I posted up a tutorial on highlighting your figs here. The problem is knowing where the shadows and highlights go on a model. It's been a major issue for me in the past, but I've seen some improvements in my painting ever since I used this trick.